 |
|
There you are, driving along and minding your own
business while chatting on 2 meters.
Then you spot lightning ahead.
Your thoughts immediately turn to your
HF ham station (mine is in Photo A).
“Did I remember to disconnect the
antenna from my rig?”
“Should I turn back or continue on?”
Well, if you had constructed and installed an automatic
antenna relay, your rig
would be safe.
I
built just such a device for that very reason for use on coaxial
cables.
A DPDT relay connects my linear
amplifier to a 5-position antenna switch when the rig is on.
When off, the amplifier’s RF center
conductor is disconnected from the antenna and connected to
ground, and the antenna center conductor goes to ground as well.
That is triple protection.
|
|
|
 |
|
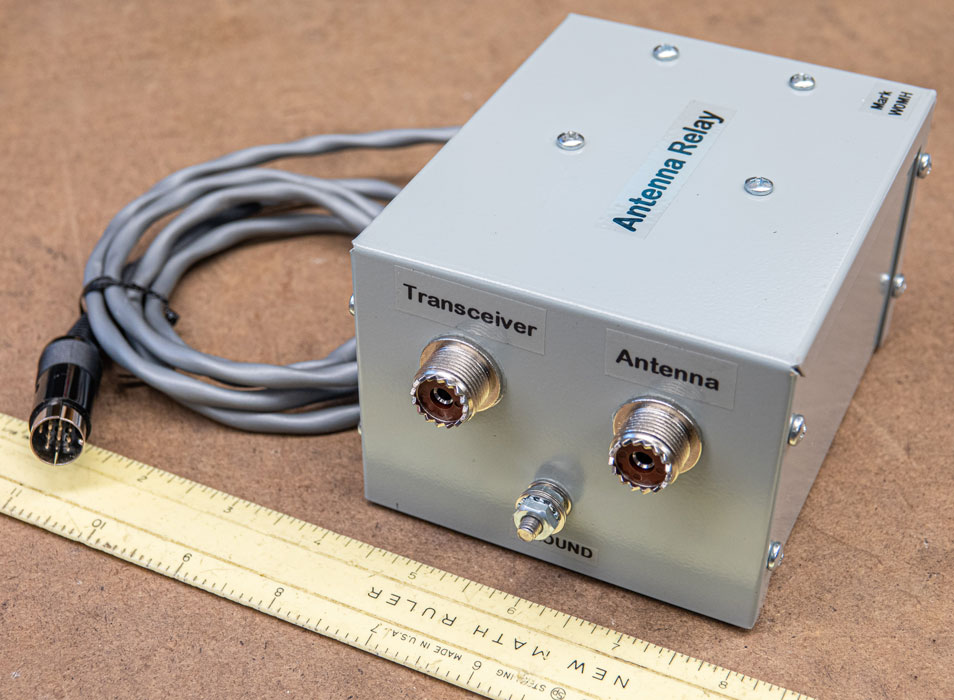
Photo B. Connector end of the antenna relay
box.
The project revolves around the capabilities of a Potter
& Brumfield/Tyco Electronics PRD-11DY0-12, DPDT 12 VDC relay.
It has silver plated contacts with a
rating of 20 amperes at 277 VAC (781 volts peak to peak).
For perspective, 1500 watts into 50 ohms
is 5.48 amperes with 274 volts RMS.
Peak-to-peak voltage is 772 volts.
As a radio broadcast engineer, I
successfully used this relay at 1-KW AM broadcast stations over
the years.
It was perfect for selecting a main or
auxiliary transmitter to the antenna.
Never had a problem.
The antenna relay needs 12 VDC power that is on only
when the transceiver is on.
Not all rigs can do this.
In my case, power comes from the
accessory connector of my Icom IC-7300.
It has a 13-pin DIN connector with power
output only when the rig is on.
I found a used connector in my junk box
and joined it to a two-conductor cable.
The current is fairly low, as only 169
mA is required to run the relay coil, plus 10 mA for the LED
lamp.
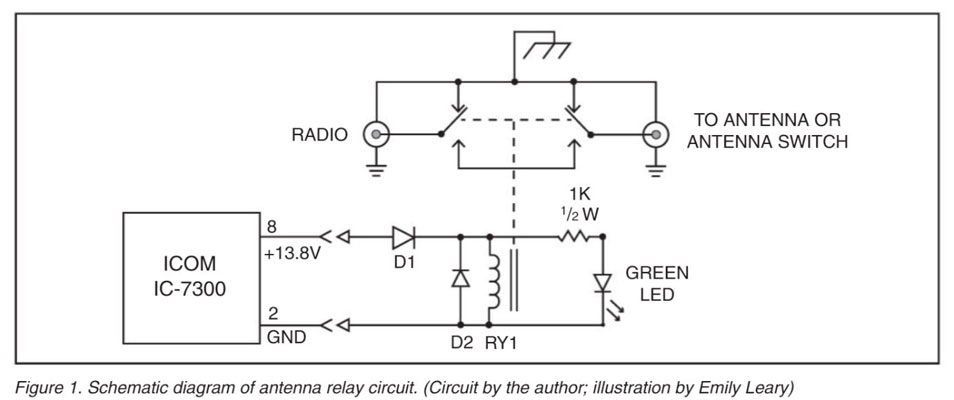
There is a diode across the relay coil to prevent the
relay from producing a voltage spike the instant power is shut
off.
This sort of EMF transient could damage
the device that is powering the box.
I originally started with a fuse in
series with the power, but later switched to a diode to “steer”
power to the relay.
Lacking that, accidentally connecting
the 13.8 volts backwards would have looked like a short circuit
because of the diode across the relay coil.
The parts list is in the sidebar. Small items came from
my junk box and hamfests. The box I chose is as small as
practical to house the relay.
You might prefer something else.
Let me remind you that the box should be
metal, as opposed to plastic or PVC.
The goal is to keep RF radiation inside
the box to prevent harming someone.
I drilled four more holes for screws to
increase mechanical integrity and to help keep RF inside.
Parts List with prices for the larger items:
1 –
P&B/Tyco Electronics PRD-11DY0-12, DPDT, 12 VDC relay, $57.55 at
Digi-Key
1 - Hammond 1411L, 5” x 4” x3” grey aluminum utility
box, $12.38 at Digi-Key
2 - SO-239 chassis mount connectors
1 - Green LED indicator with mount
1 - 1 K ohm/half-watt
resistor
2 - 1N4004 diode
1 - Accessory connector for the
rig
Building the Relay
Please refer to the photos as we discuss the
construction of the relay, starting with Photo B. The schematic
is in Figure 1. The antenna relay described here is not
high-tech.
It is an easy project that almost any
ham can tackle.
My advice is to take time and pride in
the final result.
Photo C gives us a look at the inside of the box. Use
good judgement, along with a ruler, to center the relay and
connectors in the chassis for a clean appearance.
A drill press was used, but you could
get by with a hand-held drill if you are careful.
I sometimes drill a small pilot hole for
position accuracy, then enlarge with a larger bit.
|
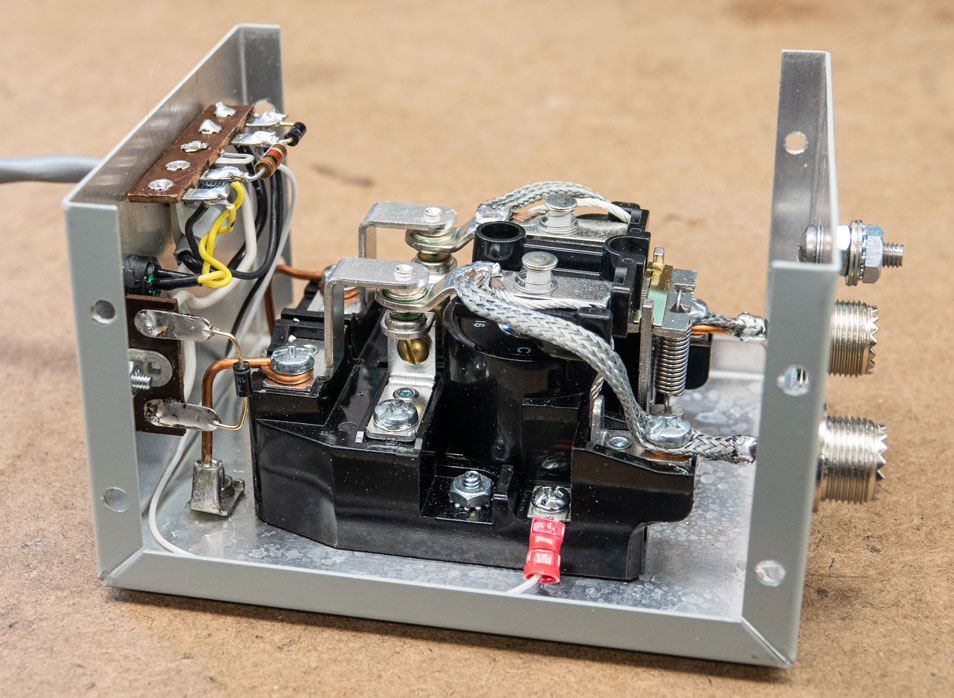 |
Photo C. Inside the
relay box.
|
|
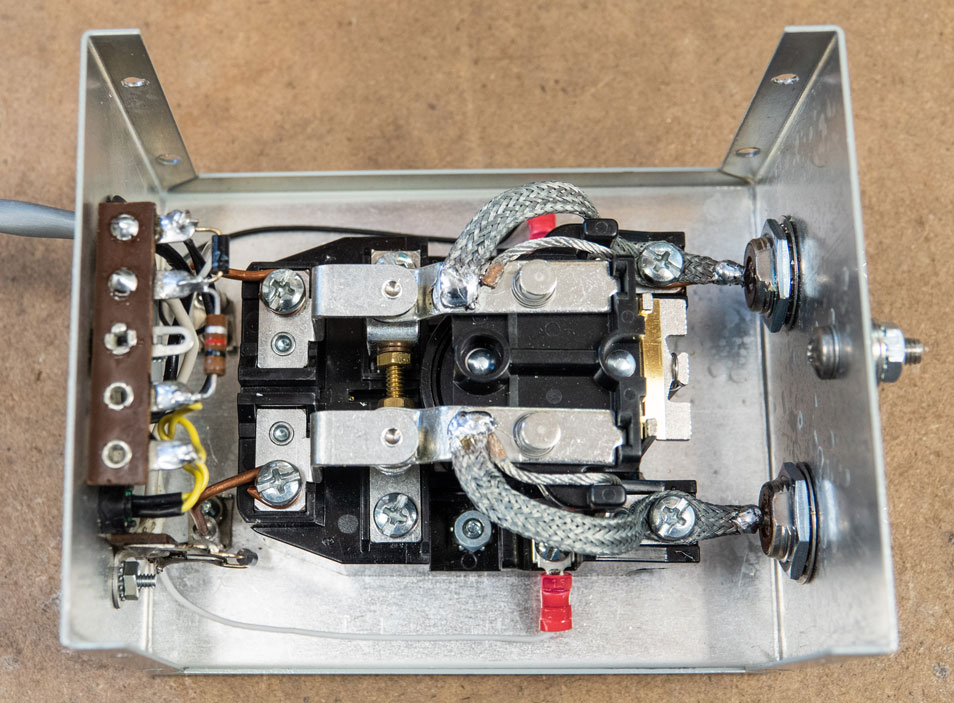
Taking a look at Photo D, the relay's RF connections are
1-7/8 inches apart, so it was logical to use the same spacing
for the SO-239 connectors.
Starting with a 1/4-inch hole, I used a
5/8-inch chassis punch for the SO-239 connectors.
From there, #12 solid copper wire runs
to the RF relay.
It is easy to do and is good for 20
amperes of current … at least at DC, but it is a little less at
RF frequencies.
I used crimp-terminals on the ends of
the two wires that go to ground.
Instead of crimping, I soldered them on.
The idea behind the terminal is to avoid
a situation where dissimilar metals (copper and aluminum) are
bolted together.
Corrosion could compromise the
connection, especially in a humid environment.
Keeping RF lead lengths short is very important for low
VSWR.
I started by using a wire between the
two normally-open relay contacts but changed to a brass 6-32
bolt with three nuts and lock washers.
You can see that in Photo D.
Finally, I soldered some 1/4-inch braid
in parallel with the wires on the relay armature and out to the
SO-239 connectors.
This further reduced inductance.
Testing confirmed the braid did not
hamper mechanical operation of the relay.
|
|
Photo D. Top view of
the box showing a brass bold joining normally-open (N.O.)
contacts on the relay.
In Photo E, a green LED indicates the relay is allowing
RF to pass through.
As an added touch, I added four stick-on
feet, not shown in the photo.
You’ll notice I used a 10-32 bolt as a ground point near
the RF connectors.
This should be connected to
station ground, along with your rig and other station equipment.
That’s just good practice in any ham
shack.
Retain a copy of this article, or your
schematic version of this project, in station files for future
reference.
|
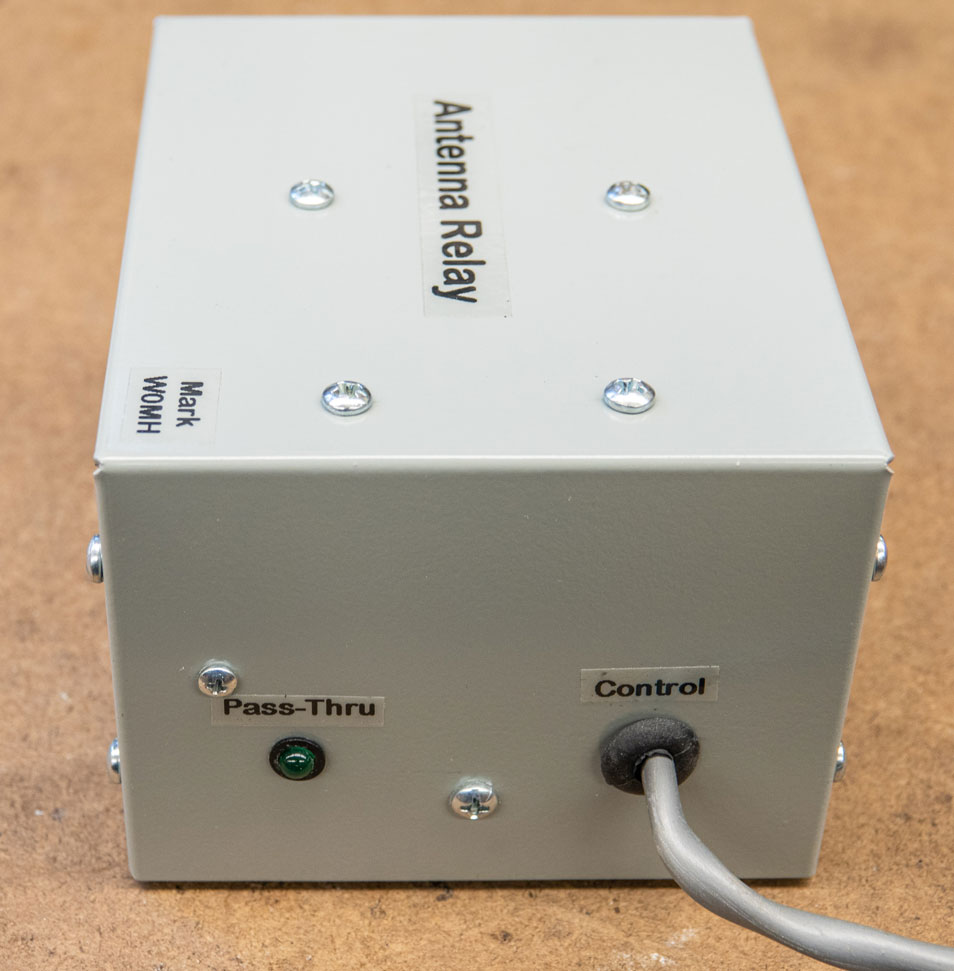 |
Photo E. Side of box
showing the LED and control cable.
|
|
Pass-through power loss is very low with this design.
Return loss measurements showed the VSWR
was 1.01:1 on 160 meters, 1.02:1 on 80, 1.03:1 on 40, 1.04:1 on
30, 1.05:1 on 20, 1.06:1 on 17, 1.07:1 on 15, 1.08:1 on 12,
1.09:1 on 10, increasing to 1.17:1 on 6 meters.
I don’t recommend this configuration for
use above 54 MHz.
In my opinion, it is a small price to
pay for the security the relay affords.
It’s
your choice.
There is one thing … this relay protects ham equipment
from high voltage between the coaxial cable shield and inner
conductor.
It is effective when the antenna coax
shield is tied to the building electrical service
entrance/electrical panel ground.
That arrangement is known as a
single point ground where
lightning will want to go to ground at that point, rather than
going to the radio equipment.
Think of the rig as a “stub” from the
service entrance.
It gets power and RF from the same
ground point.
There is no reason for lightning to go
there.
An additional ground at the shack is a
bad choice because then the radios can be in the lightning path
to ground.
I now have much more confidence, knowing that my rig is
as safe from lightning as I can make it, without the hassle of
disconnecting the antenna after each ham session.
|
|
|
Note:
Mark Persons W0MH is a retired radio broadcast engineer.
He was first licensed as WN0AXD at the age 15 in 1962.
Mark received the Engineer of the Year award from the
Society of Broadcast Engineers in 2018 and their Lifetime
Achievement Award in 2020.
He currently mentors four radio broadcast engineers and
is a member of the National Radio Systems Committee, which
developes improved technical standards for radio broadcast with
ultimate adoption by the FCC.
01/03/2022 Email:
Hi Mark. I read your article in the October 2021 CQ Magazine
about the antenna grounding relay and my first thought was
“Well, Duh!” That thought was prompted by the fact I had
everything required to build the project in my junk box and that
I had, several years ago, built a similar project to
automatically ground my ladder line fed 80m loop, though that
relay was mounted in a non-metallic box. Thank you for a well
thought out and well written article. And thanks for the
impetus to get into the shop and actually build the project. 73,
Ron NY0A, Dassel, Minnesota.
|
|


